📥 Clone Databunker Pro Setup Repository
All installation scripts and configuration files are available in our public GitHub repository:
🔗 https://github.com/securitybunker/databunkerpro-setup
To get started, clone this public repository:
|
|
This repository contains:
- Helm charts for Kubernetes deployment
- Docker Compose configurations for both MySQL and PostgreSQL
- Setup scripts for generating initial credentials and keys
- Production-ready configurations with external database support
🐳 Deploy Databunker Pro via Docker Compose
1. Choose Your Database
After cloning the repository, navigate to the appropriate directory:
The repository provides two Docker Compose configurations:
For MySQL (Percona 8):
|
|
For PostgreSQL:
|
|
3. Prepare Environment
If you want to generate initial database access credentials, SSL keys, and a wrapping key, run the provided generate-env-files.sh script:
|
|
4. Deploy Databunker Pro
- Pull the latest images:
|
|
- Start the services:
|
|
☸️ Deploy Databunker Pro via Kubernetes
1. Add the Helm Repository
The official DatabunkerPro Helm chart is available through GitHub Pages:
|
|
2. Install DatabunkerPro
|
|
3. Expose the Service
After installing the databunkerpro Helm chart, you need to expose the Databunker Pro service:
|
|
Then, open http://localhost:3000 in your browser to finish the setup process.
4. Production Deployment (Recommended)
For production environments, we strongly recommend using external databases (AWS RDS, Google Cloud SQL, etc.) instead of internal databases. See the GitHub repository for detailed configuration examples.
Note: Start with one pod initially. After completing the setup, you can scale to more pods.
⚙️ Initial Setup
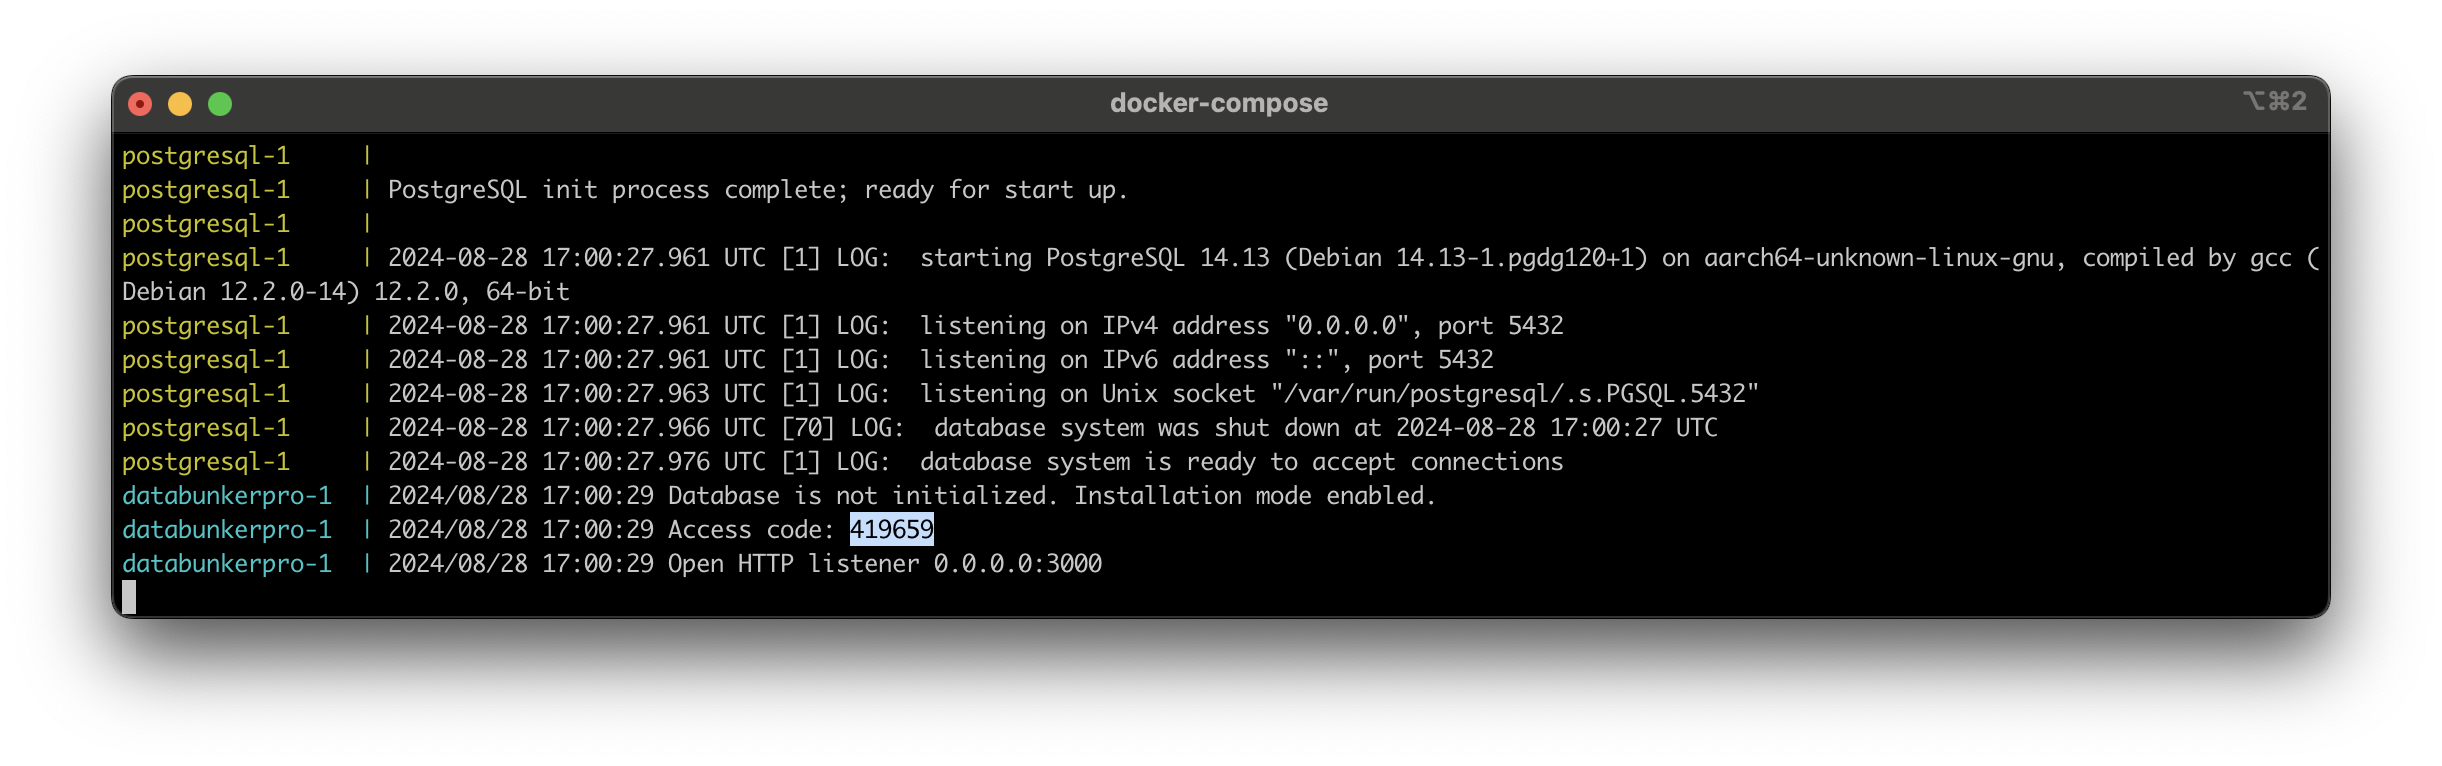
- Once the databunkerpro container is started, check the service logs to find the Access Code.
- Open the Databunker Pro setup page in your web browser.
- You will see the following screen:
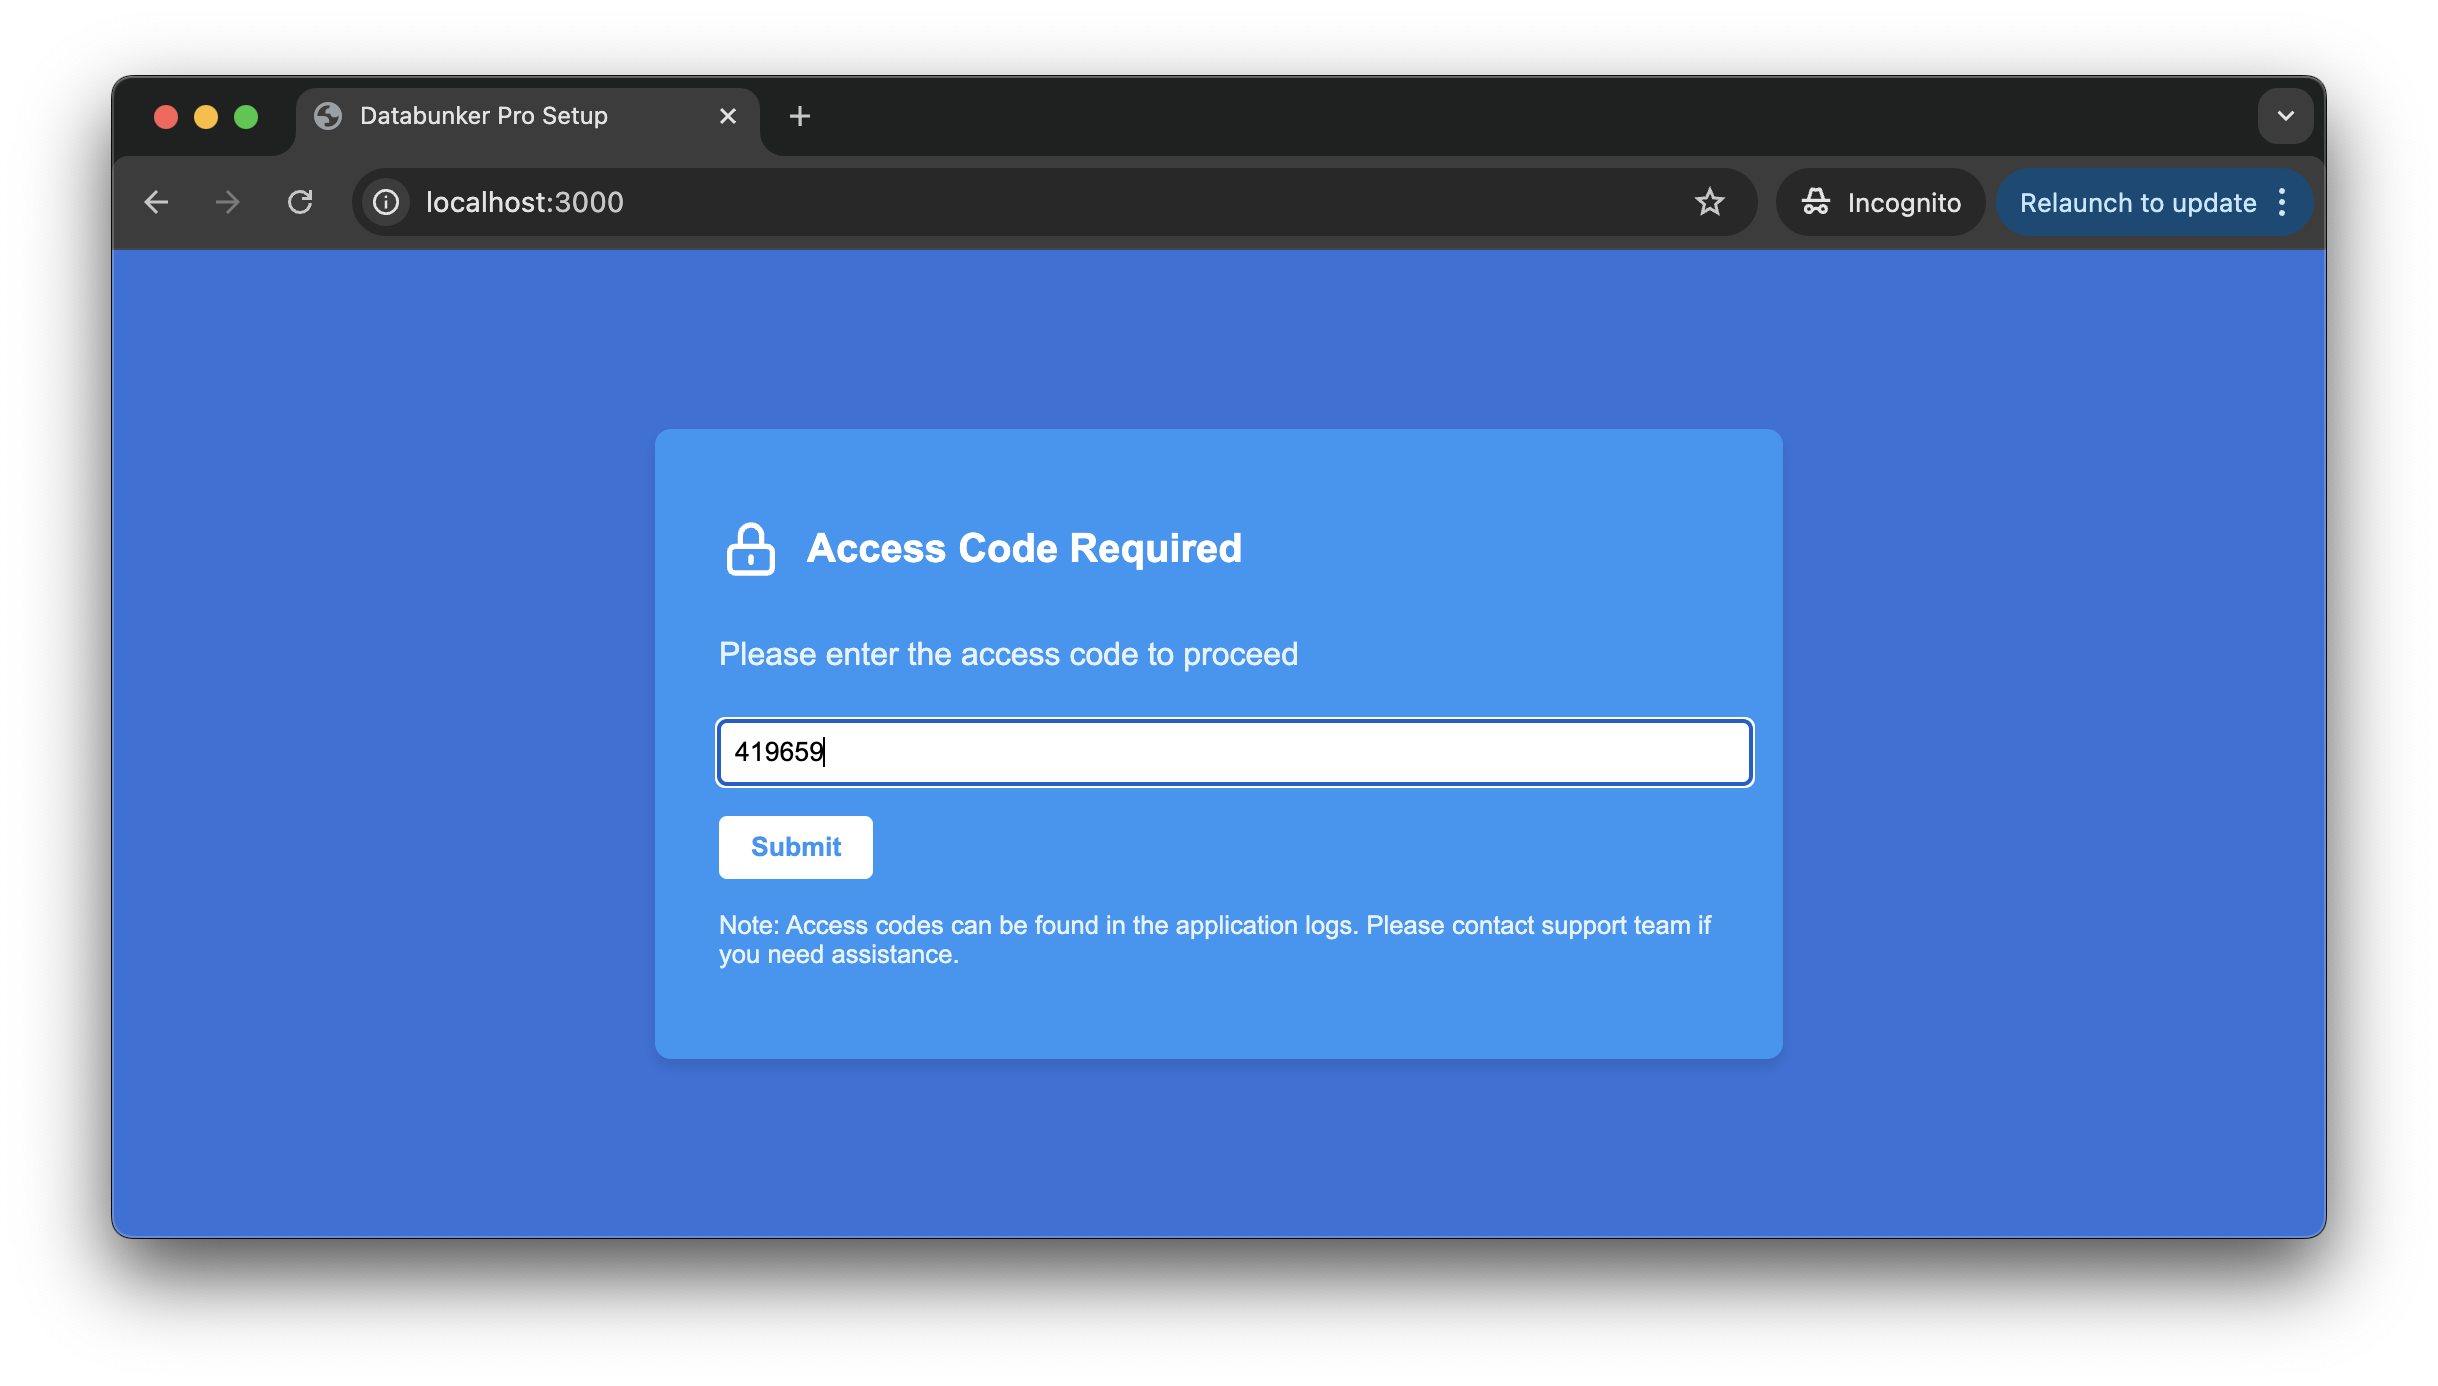
- Enter the Access Code found in the service logs.
- Upon successful check, the service will generate encryption and access keys, and create the database.
- You will then see the completion page:

- Make sure to securely store the Root Access Token, Wrapping Key, and Shamir Key Shares.
- Click the Start Databunker Pro button to start the Databunker Pro service.
🎉 Post-Installation
After completing the setup, you can now use the Root Access Token with the API to save or retrieve data.
🔒 Security Notes
- Databunker Pro uses an internal Master Key to encrypt the data. This key is automatically generated and never revealed.
- The Wrapping Key is used to encrypt the internal Master Key, adding an extra layer of security.
- Regularly rotate the Wrapping Key to enhance security.
- In case of a lost or compromised Wrapping Key, you can use any 3 out of 5 Shamir Key Shares to generate a new one.
📈 Scaling (Kubernetes)
Once the Databunker Pro is installed and configured in Kubernetes, you can now scale to more replicas:
|
|
Adjust the number of replicas as needed for your use case.
For any additional assistance or questions, please refer to the Databunker Pro documentation or contact the support team.
👋 Hello from the Databunker Team
Our developer team will be happy to customize Databunker for your specific needs!